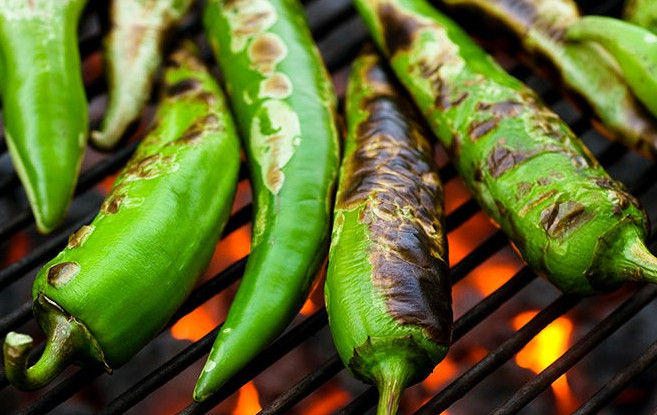
Howdy Folks, It is CHILE time!
It is Chile time, and the Chiles are hitting the stores. Let’s begin with a few facts and myths. Chiles are primarily grown in New Mexico, often in or around Hatch New Mexico. Chiles can be grown elsewhere. Many of us refer to chiles as “Hatch Chiles”. Hatch is the name of a Town as well as the location where many chiles are grown. The Hatch operation has more than 700 farms growing their chiles.
With the permission of our local Albertsons store in Roswell, NM, we will use excerpts from their recent ad. In that write up they refer most times to Hatch but the verbiage pertains to all chiles. Since they refer to Hatch often, we will go with that.
CHILI SEASON IS HERE
The Albertson’s staff at the Corporate and local levels have become pretty much Hatch Chile heroes. Not only do they search far and wide for chiles bursting with flavor, they’re also an authority on everything from picking to prepping. Get ready to deepen your addiction to the Southwest’s most coveted pepper because this year, we brought the heat and how-tos on how to handle it.
History of Hatch Chiles
Did you know that the ‘Hatch Chile’ is a variety of pepper? It’s actually just a term to describe several different varieties grown in Hatch, New Mexico. Hatch has become the Chile capital, known for producing Chile peppers with unique, zesty flavor. These Hatch Chiles are so appetizing that they have cultivated a fan following each summer.
Fun fact: Many people think that the red Hatch Chiles and green Hatch Chiles are different types of peppers, when in fact, they come from the same plant, just picked at different times. The red Hatch Chile pepper is simply riper than the green Chile.
This Chile pepper has cultivated quite the following due to its unique, fiery flavor and short season. Easy to cook with, we like to think Chile goes with everything. Spice up your life this summer with authentic green Chile that are sure to be a winner amongst all.
Choosing Chiles
Join in on the Chile obsession this summer with our foolproof instructions on hacking the Chile season. We’ve got a checklist on how to pick the perfect Chile peppers as well as step-by-step instructions on how to roast and prep them for your delicious recipe of choice. Don’t miss out on the fresh, fiery flavor we all know and love!
Are Chiles new territory for you? Don’t worry – we’ve all been there. For everything you need to know about the renowned Chile peppers and how to prep your peppers for greatness read on. You won’t regret it!
Full of delicious flavor and easy to cook with, Chiles are the perfect addition to any recipe if you’re looking to add a little bit of spice.
Spice Up Your Summer
Backyard barbecues are a summer essential as nothing says summertime like firing up the grill and enjoying the nice weather with friends and family. Spice up your summer barbecue classics this summer by incorporating Chiles into your grilled favorites like burgers, poppers and even corn on the cob.
Preserve The Fiery Flavor All Year Long
The fiery flavor of Chiles doesn’t have to disappear after the season is over.
It takes two easy steps to turn fresh chiles into a year full of flavor and zest. Don’t wait for the season to be over! Preserve your Chiles now for a spicy addition to your favorite recipes throughout the year.
Roast & Prep Your Chiles
The first step in preserving the fresh, fiery flavor of Chiles year-round is to pick, roast and prep them while they are still in season, before freezing.
While you can just toss your whole or diced chiles in the freezer, we recommend roasting the chiles first, before freezing, to preserve their deep, smoky aroma, as well as make peeling them a breeze. There are many ways to roast Chiles, all of which we talk about, but some vendors offer free roasting.
Freeze for Fiery Flavor Year Round
If you’re not roasting your Chiles, simply toss them, whole or diced, into a sealed plastic bag and place them in the freezer to enjoy later. If you are roasting them, you may also choose to freeze the chiles as is, or you can peel and seed the chiles while fresh. From there you can freeze them whole or choose to dice them into small pieces.
Once your chiles are ready for freezing, place them into plastic freezer bags or shallow freezer-friendly containers to prevent freezer burn. If you are using plastic freezer bags, try to remove as much air out of the bag as possible before placing in the freezer. Of course, if you have been following our website KitchenTipsbyPK.com you know we highly recommend a vacuum sealer.
Store your chiles in the freezer for up to a year and thaw in the refrigerator before using.
Now to wrap this up here are a few tips from Patty & Doug.
- 1) We usually buy our chiles and bring them home to roast. The store roasting is great except you tend to get not all uniform sizes. We usually buy our chiles in the produce section so we can pick the ones we want. Uniform sizing just makes them easier to handle, roast and freeze.
- 2) We prefer to roast our chiles on the gas BBQ. Next to the BBQ we have a very large bowl filled with ice and water. As the chiles come off the BBQ they go into the ice water. Then the chiles are moved to the kitchen sink and are put into more cold water. This makes the peeling much easier.
- 3) After the chiles are peeled and cleaned, we put them in pint size zip lock bags, squeeze out as much air as possible and zip. In our case we take anywhere from 6–10-pint size bags and vacuum seal them in a larger sealer bag. (Hint: Leave extra room at the top of the sealer bag so you can cut the bag open, remove a small bag or two, and re-seal the bag to go back into the freezer.) If you don’t have a vacuum sealer, you can use a gallon size zip lock bag.
- 4) If you don’t get to peeling and cleaning all your chiles at once you can freeze them at most any stage. When you remove them from the freezer and defrost them, run them under cold water and they should peel easily.

Patty and Doug
Kitchen Tips
TPGTeamSuccess@Gmail.com
P.S. If you don’t see chiles at your local grocery store, ask the produce manager to order them.
